Droning the Castle Hill Rock Formation and Building 3D Models with Photoscan & Drone2Map
Posted on Tue 05 July 2016 in Expeditions
This is my second blog post in a short series on my research trip to New Zealand. You can find Post #1 here
This is also cross-posted with a post on the ESIP Federation website. Find it here.
Intro
Some of the predominant challenges in using an off-the-shelf drone for scientific research are the limitations on flight distance and duration. First there are the built in distance limitations. Off-the-shelf drones are made for taking selfies and short videos, so the manufacturers don’t expect you to need to cover a large area. As a result, their allowed range and the strength of their communications signal (between the aircraft and the controller) is not as great as with commercial-grade drones. I decided to take a slight detour in my New Zealand trip to test out what I really could do with my DJI Phantom 3 Standard while restricting myself to just one battery. This gave me approximately a 20 minute flight time. I processed the imagery twice, once using Agisoft Photoscan, and once using ESRI's ArcGIS Drone2Map. Here are the result.
The Location: Castle Hill, NZ
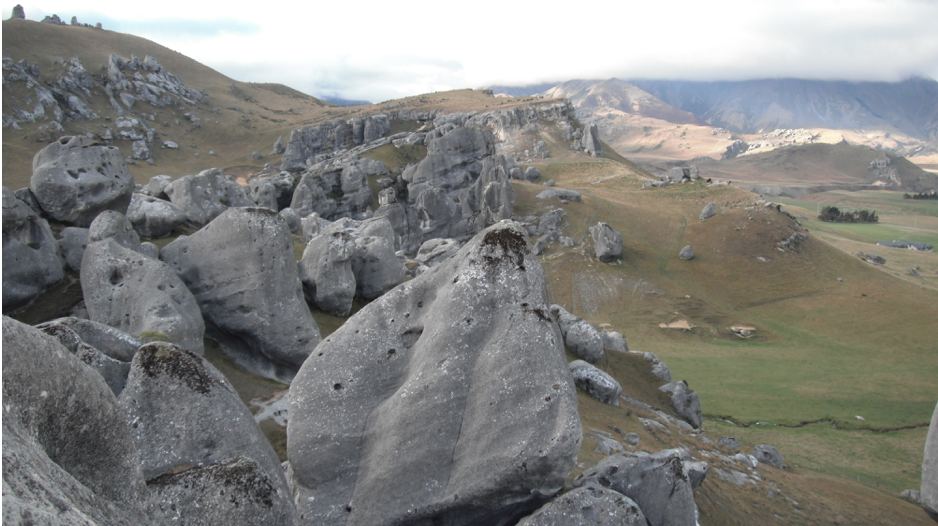
There’s a large rock formation in New Zealand known as Castle Hill. The rocks jut aggressively from a hillside forming what does look a little like naturally occurring battlements. I happened upon it and immediately felt that I had to Drone It.
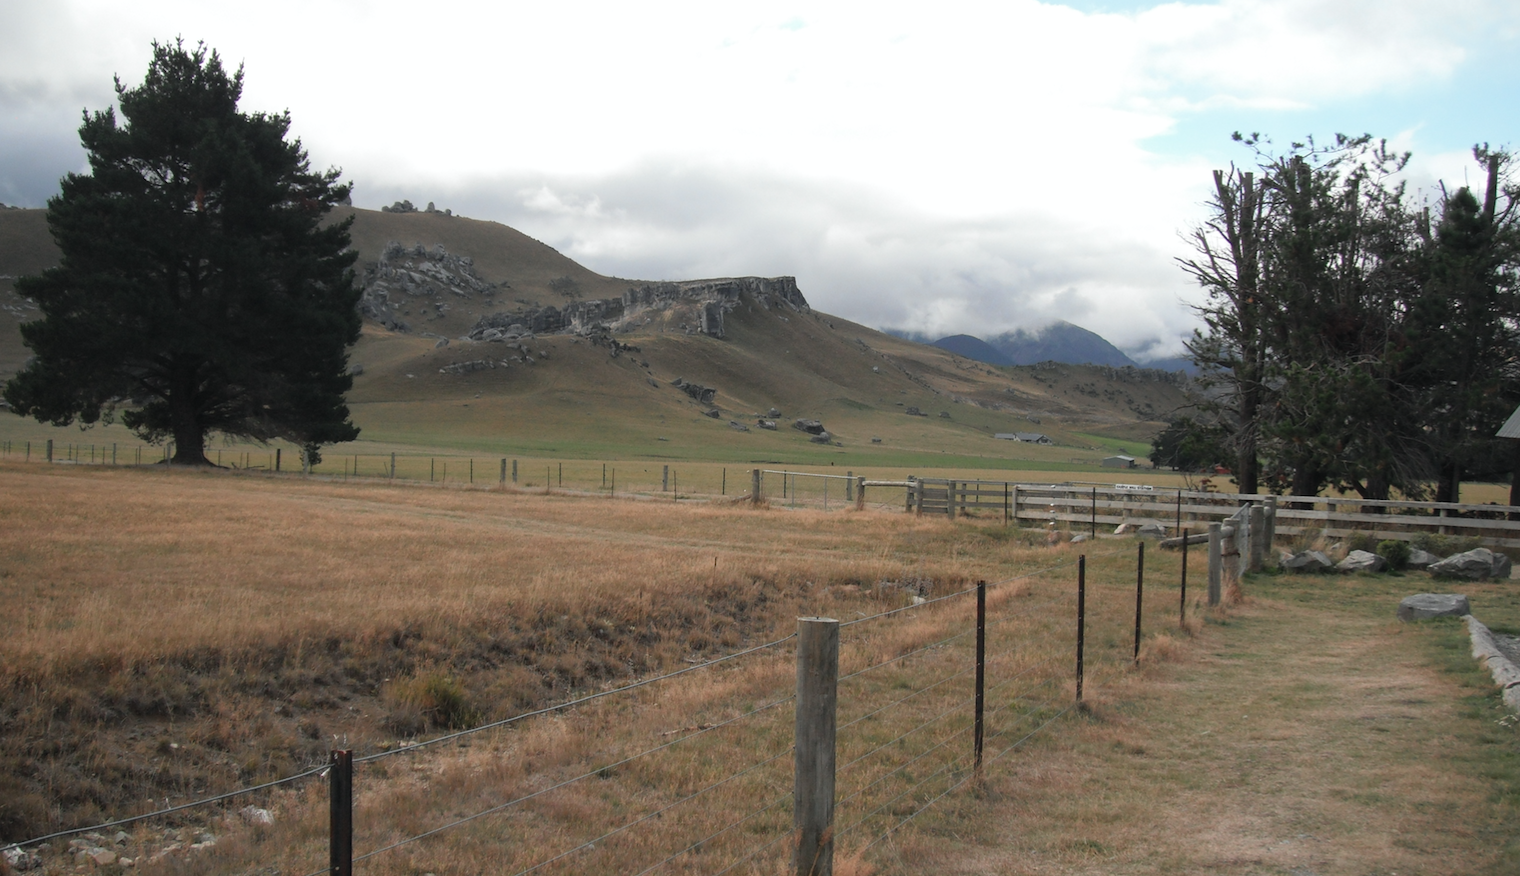
I would later learn that Castle Hill is a prominant location for rock climbers in the area. In addition to recreation, it is also used as a field site/teaching tool for geology students by some instructors at the Antarctic Research Center, Victoria University Wellington.
The Flight
For the DJI Phantom, you control the drone with a regular RC controler, but you can also link it to your phone and use either the DJI App or a 3rd party app to create flight paths and flight missions. For this I used an app called Litchi with an iPad. I'll readily admit that it's not the best app out there for collecting SfM imagery, that honor probably goes to Pix4D, but using an entry-level drone limited me in this case, as the Pix4D app is not compatible with the DJI Phantom 3 Standard. I have some drone-professional freinds who refer to the Lichi app pejoratively as "glitchi", but it worked great for me, even allowing me to download and cache my maps in advance.
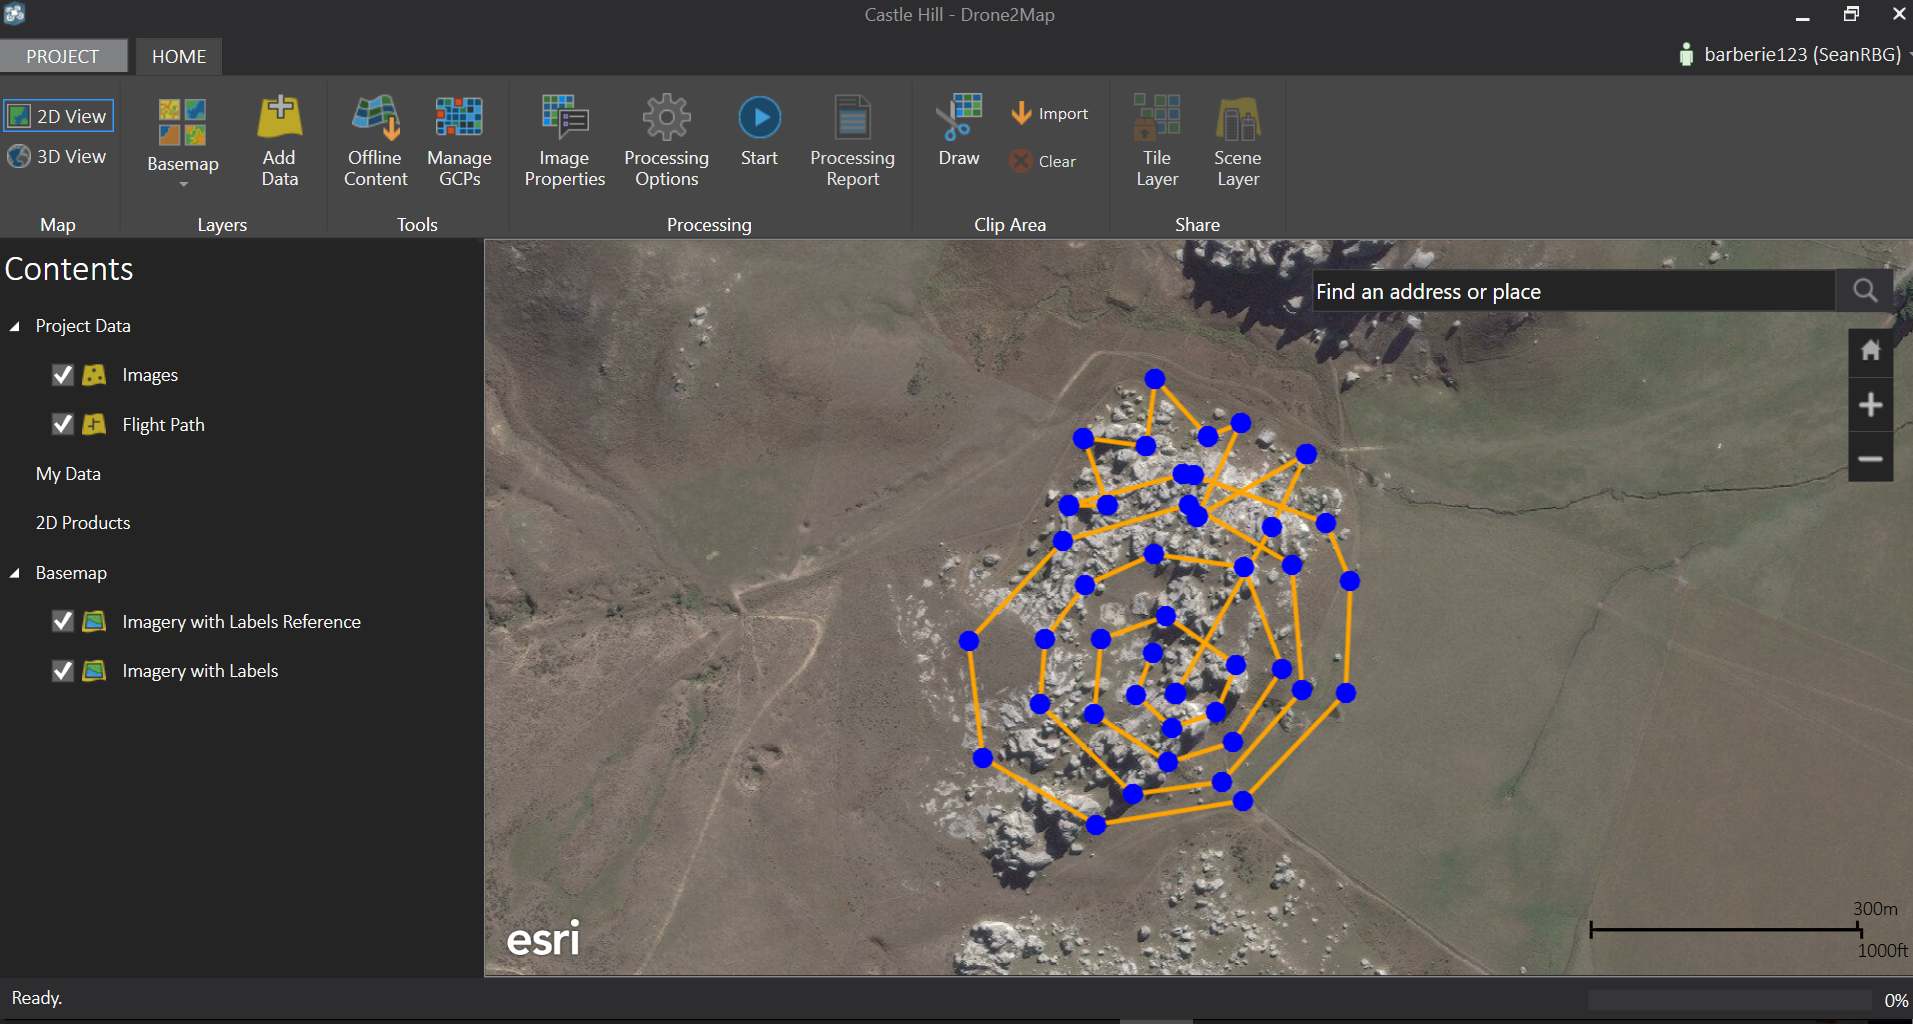
For my flight path I created concentric spirals around the area of interest, extending further and further out. The DJI Phantom Standard has a declared max flight duration of about 25 minutes. In practice I usually estimate that I have around 15 minutes, but I may be overly pessimistic having lived the last few years in chilly/battery-killing Alaska. I was able to fly this first area in about 10 or 12 minutes, giving me as much as several minutes of flight still remaining. I decided to push it and plotted another flight path on the same battery. This flight path would cover an area that I had had trouble reaching previously by going 100 ft higher. You can see in Fig 3 a spiral-shaped flight and a jagged flight path in the upper right. The former (spiral) was the first flight, and the latter (jagged) flight was the second, higher flight.
The Data and Processing

I first processed the data using Agisoft Photoscan, selecting out the viable photos and going through the standard workflow. You can see the model that that produced in Figure 4.
On the second flight, I had tested out a new trick that I hadn't tried out on the first. Take another look at Figure 4. The blue squares indicate where the camera was when it took a photo. You can see that the first flight is lower and the second flight is higher, but you can also see something else. In the second flight all of the squares form a V. That is because for my second flight I told the drone to take it's initial picture, then flip around, and take another picture. This turned out to be an excellent techinque for Structure-From-Motion as it allowed me to collect more overlapping imagery in less time, while maintaining a small angle.
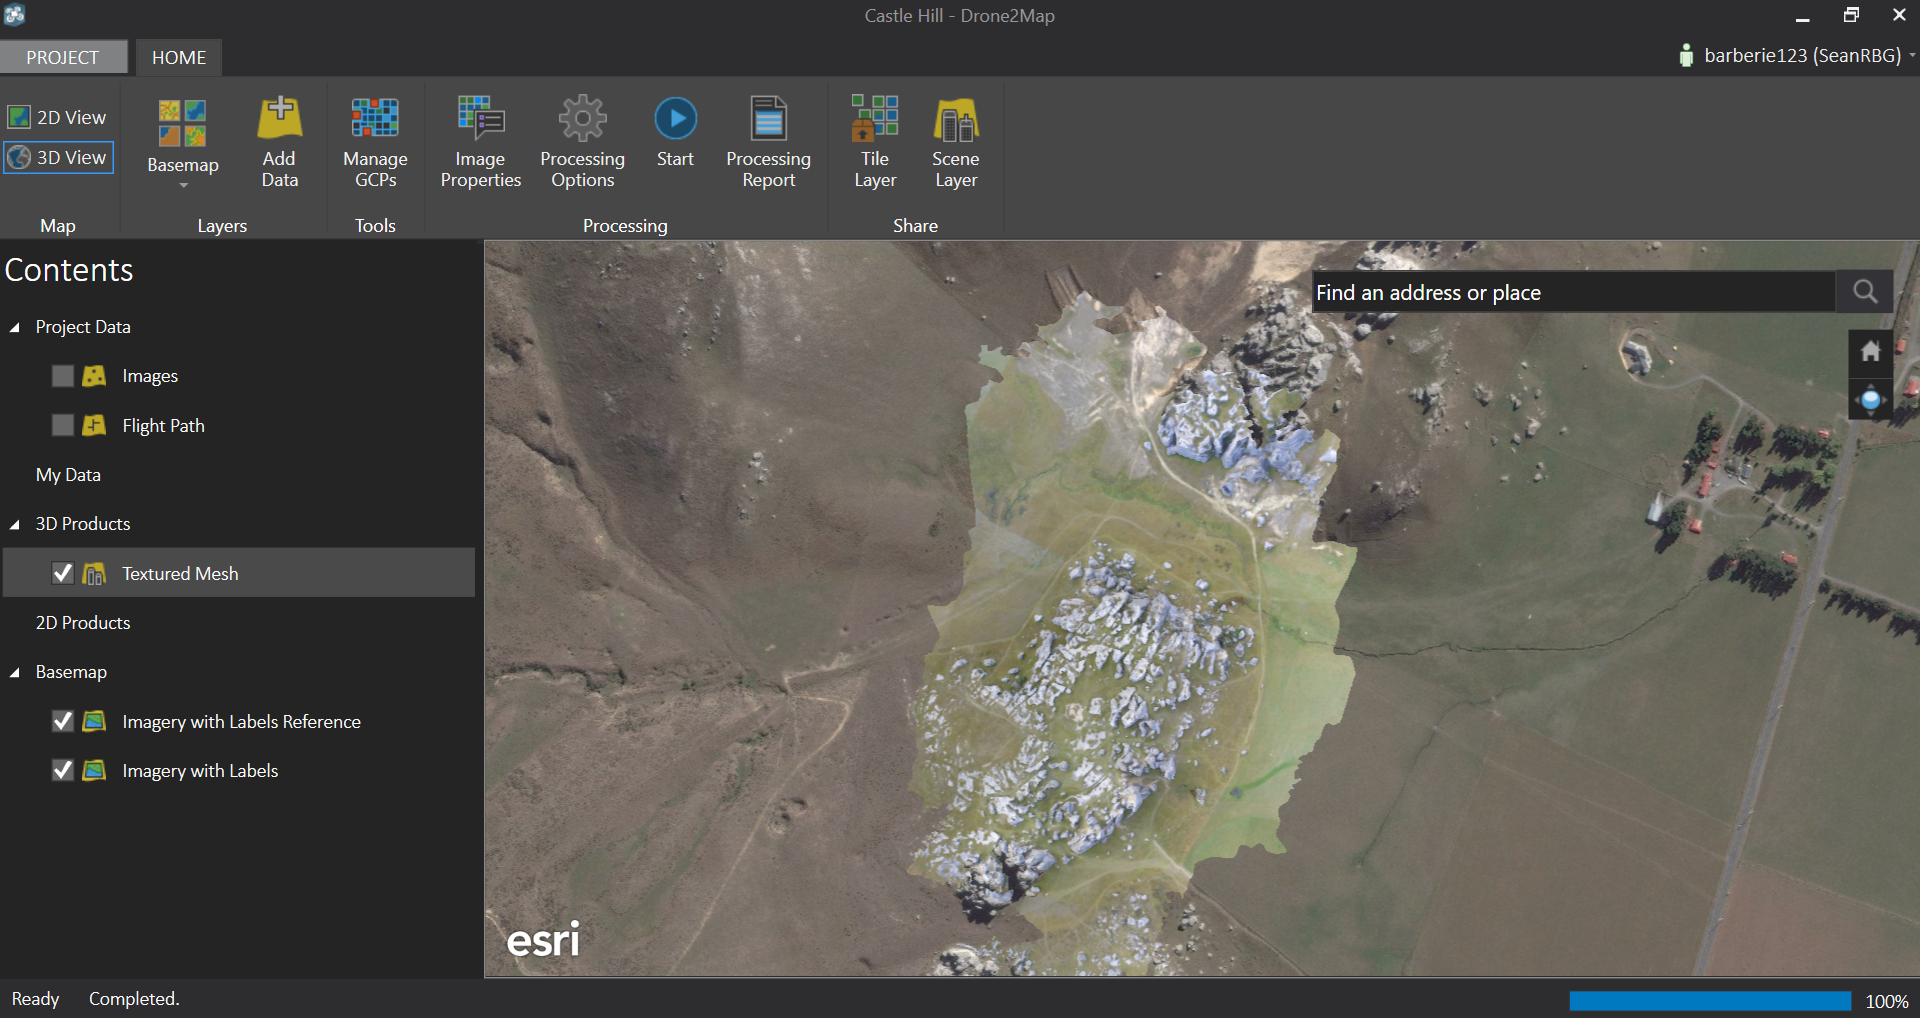
I also tried processing the data with Drone2Map after some ESIP-affiliated ESRI folks suggested I give it a try. Take a look at Figure 5. It was easy, intuitive, and fast. I would love to do a future blog post purely on using Drone2Map to process imagery with this data as a case-study; maybe in the near future.
Here's a gif of the result (sorry it's a little choppy, that's the fault of my laptop, not the software).
After-Thoughts and Data Sharing
I'm curious if anyone has any ideas about how to share these kinds of projects with a broader community of both scientists and geospatial data scientists; imagery is being broadly shared right now but 3D models, to my knowledge, are not. I've seen that the Open Science Foundation's Open Science Framework can host 3D projects, but I was not able to find an export format for my SfM models that could be uploaded to the framework and maintain their texture/mesh. If anyone knows how to do this please contact me!
Next Time
My next planned blog post is to showcase some of the fieldwork I did on Tasman Glacier with a team from the ARC, placing seismometers and my flying drone. I may also try to squeeze in a more detailed post about using Drone2Map. Check back soon!
Acknowledgements and Support
The trip was made possible with support from the S.T. Lee Young Researcher Travel Award through the Antarctic Research Center at Victoria University of Wellington and the International Arctic Research Center, University of Alaska Fairbanks. Generous funding, support, and project management and advising were also provided by the Alaska Center for Unmanned Aircraft Systems Integration (ACUASI) at the Geophysical Institute, University of Alaska Fairbanks.
Funding and support for blogging has been provided by the ESIP Federation as part of my ESIP Fellowship.
About the Author
Sean Barberie is a recent graduate from the University of Alsaka Fairbanks with an interdisciplinary M.S. in Geospatial Data Science. He is a current student fellow at the ESIP Federation where he is able to pursue his interest in geospatial data for disaster response, and science communication. His research interests include drones, data science, data visuzalization, structure from motion, and remote sensing. He is also an evangelist for citizen science and open science.
Contact
SRBarberie@gmail.com | http://twitter.com/seanbarberie | http://seanrgb.github.io/